KopterMax Flight Termination Radio
Specifications
Features
- Easy to use, one button operation
- Dedicated, encrypted data link on dissimilar frequency from drone controller
- Complete telemetry with battery voltage and fuse health
Datalink
- 433 MHz (EU), 900 MHz (US)
- Dynamic PSK, 256-AES encryption
- (coming soon via SW update) Frequency hopping spread spectrum
First installation
Hardware setup
Connect the battery to the air unit.
- Version with high current trigger output: always connect both cell balancing connector and main power connector from the battery

- Version without high current output: only the balancing connector is present on the device
Receiver pairing
The kit comes with transmitter and receiver pre-paired; should it be necessary to pair it again, or to pair to a different receiver, use the following procedure.
- Ensure both transmitter and receiver are already powered up.
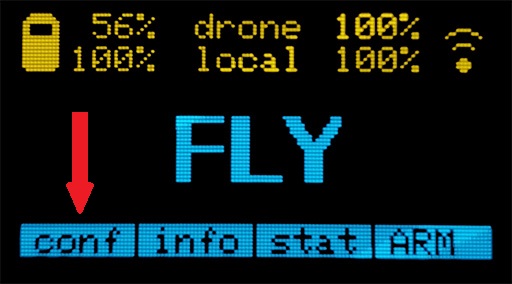
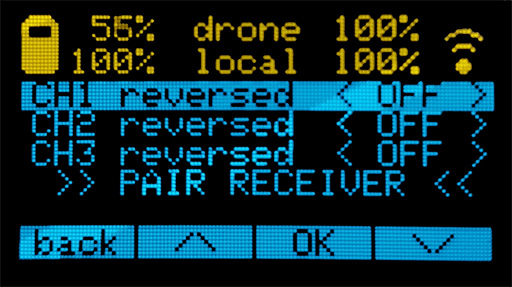
- Using the four buttons on the transmitter, enter the system configuration menu ("conf"); the function of each button is shown in the lowest row of the display.
- Use up and down buttons to navigate to the >> PAIR RECEIVER << item
- The radio will enter pairing mode
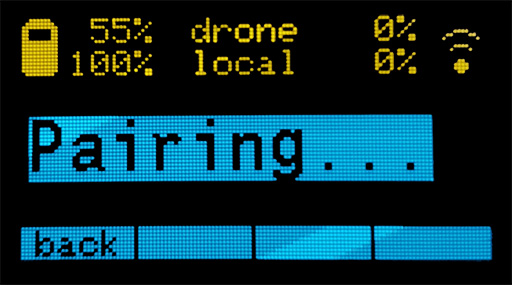
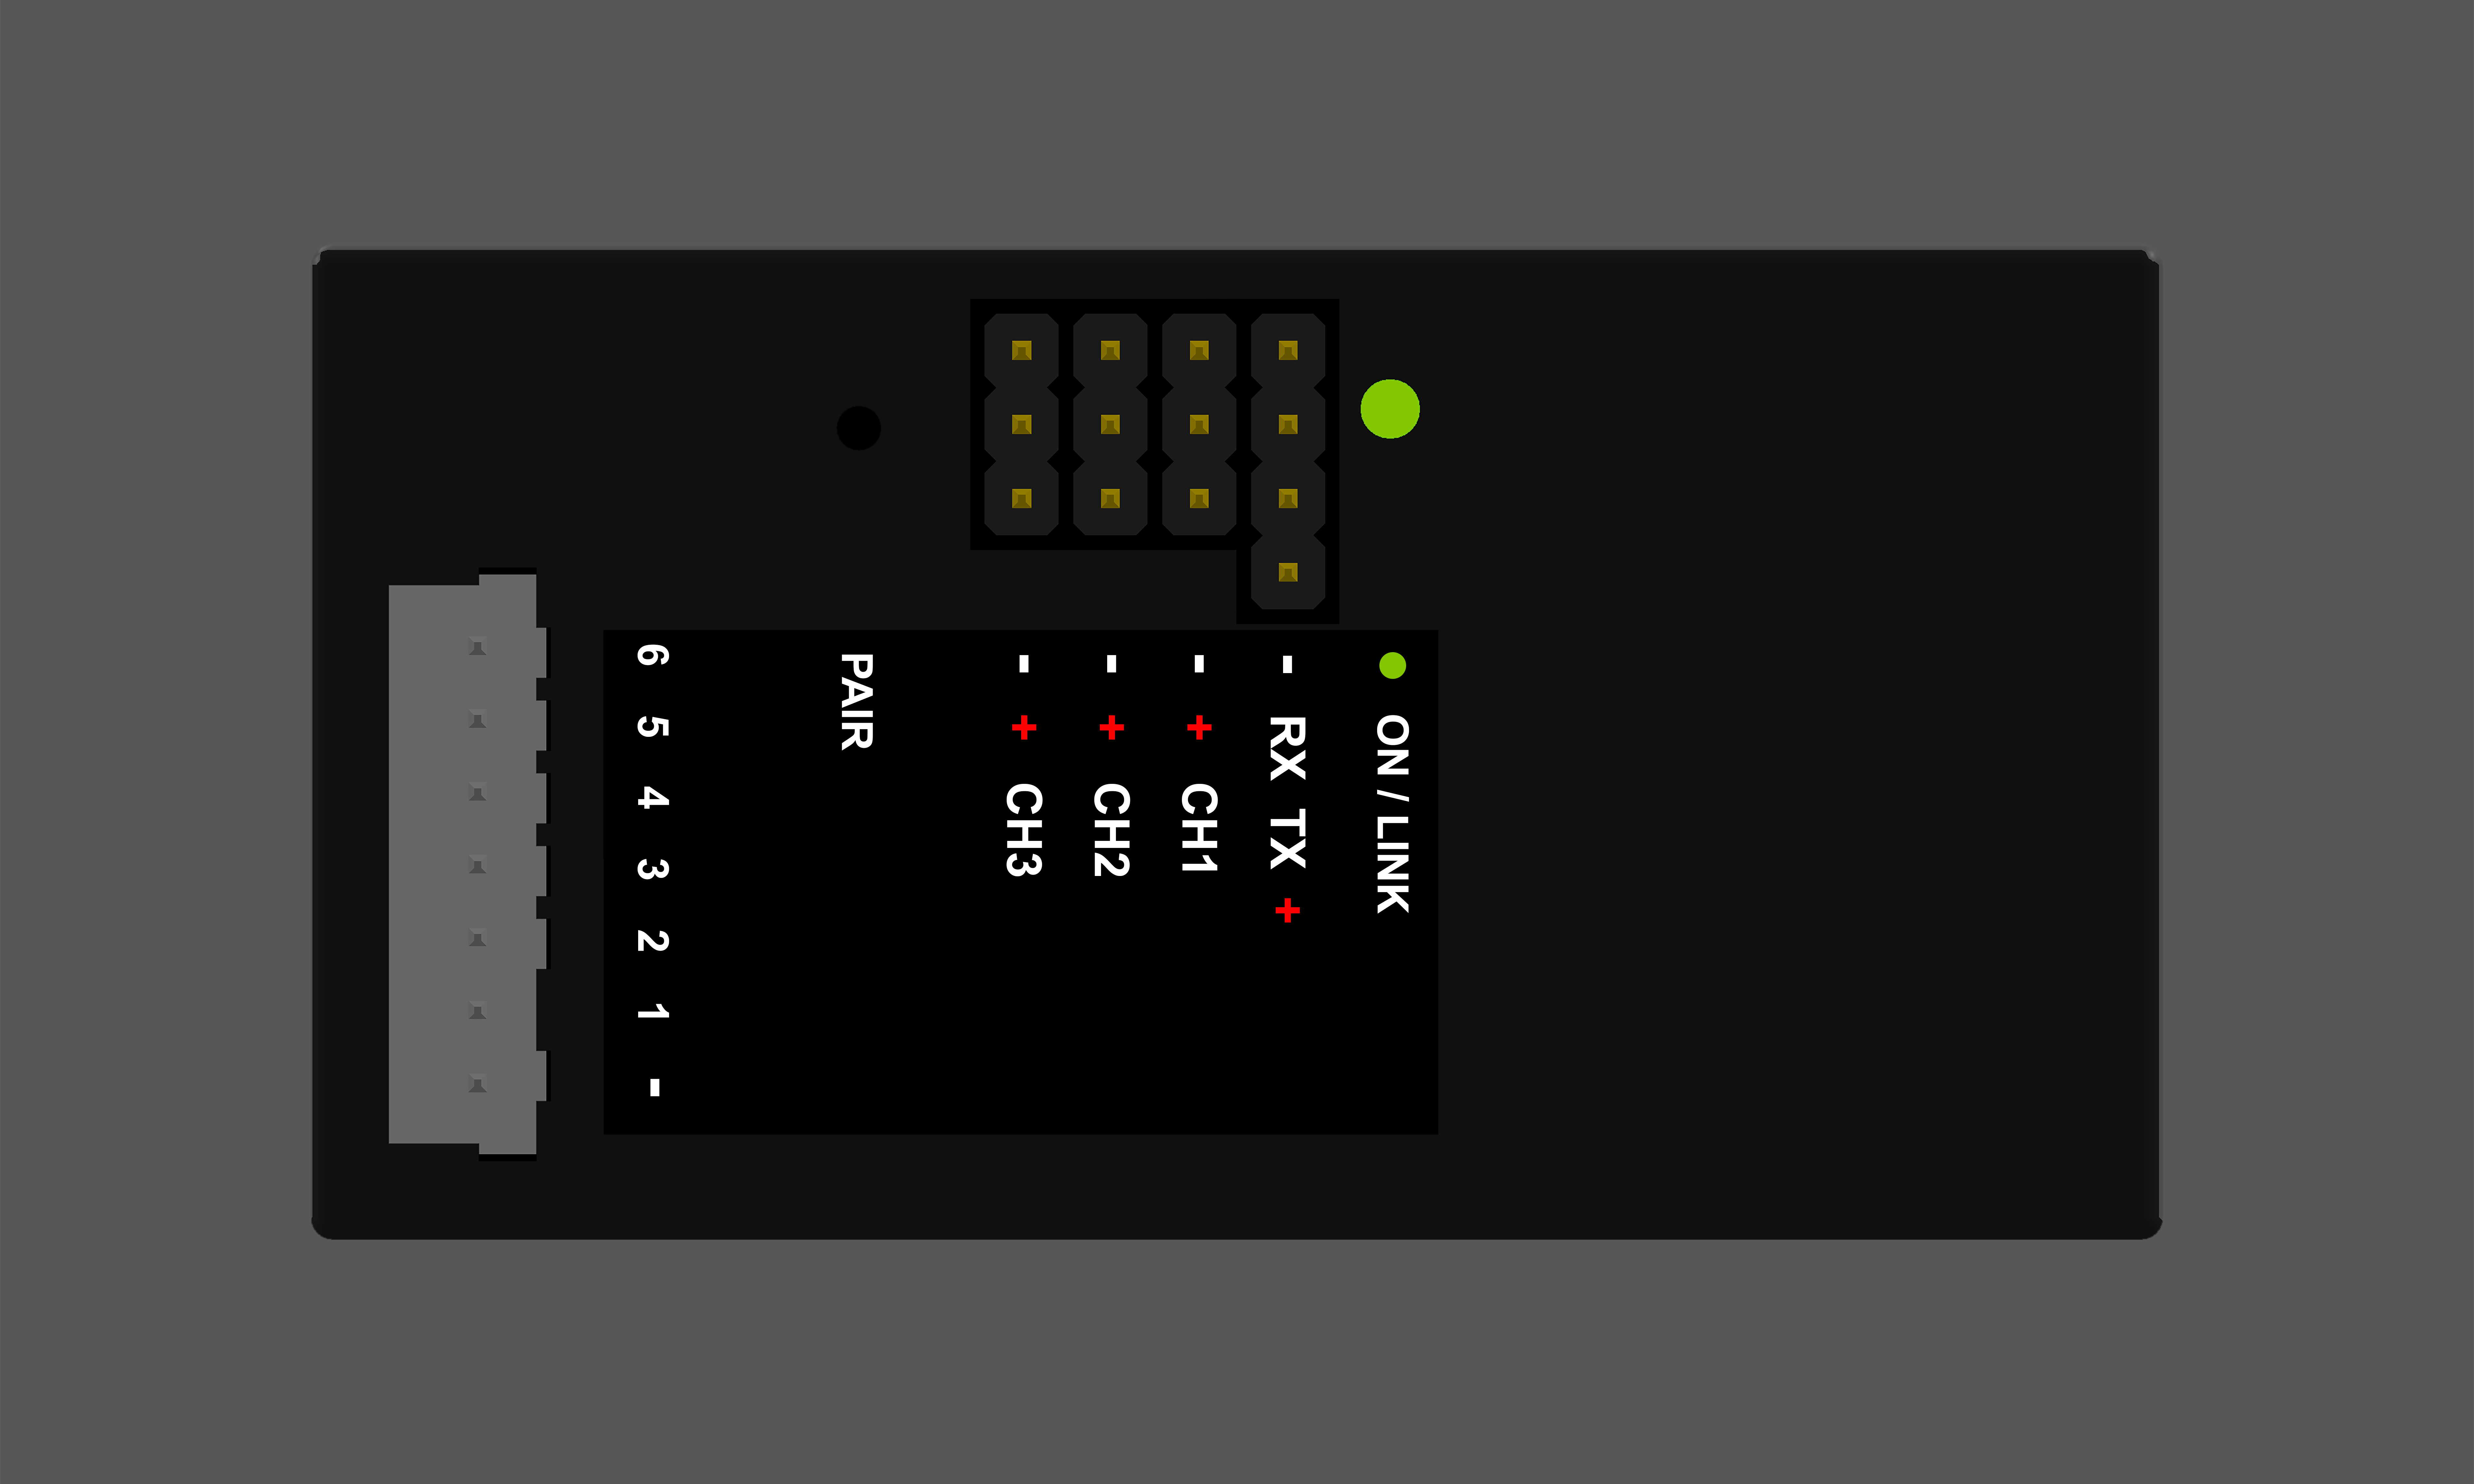
- While in this mode, use a small needle to press the PAIR button in the receiver for about 5 seconds.
Green LED should blink while pairing starts.

- If pairing succeeded, you should see the following confirmation
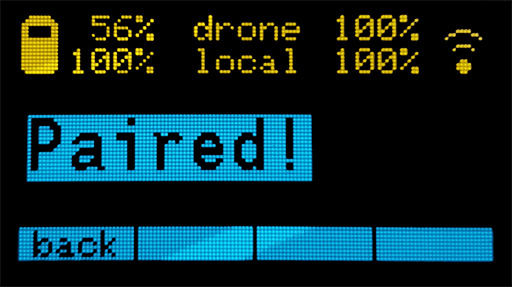
- if the receiver is not responding, transmitter returns to normal operation automatically after about after 60 seconds.
To abort the process manually, you can press the “back” button.
Configuration
Once paired with a transmitter, the receiver can be configured for various output modes.
- enter the system configuration menu ("conf") using the corresponding button
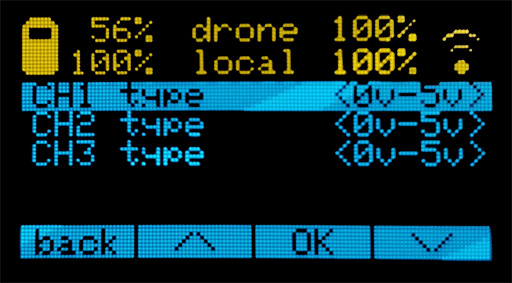
- From here, it is possible to configure each of the three output channels by selecting them and pressing “OK”.
The menu continues on the second page by keeping pressing the down button after the PAIR RECEIVER menu item.
Channel reversed:
- OFF: output is 0v (or 1000mS in servo mode) when idle, 5v (or 2000mS in servo mode) when KILL command is sent
- ON: output is 5v (or 2000mS in servo mode) when idle, 0v (or 1000mS in servo mode) when KILL command is sent
Channel type:
- SERVO mode: channel outputs 1000-2000mS pulses for
- RC servo motors and other devices
- 0v - 5v mode: channel outputs either 0v or 5v continuous voltage
Pre-flight checks
Before taking off for a flight, ensure the following checklist is completed in order to avoid misfiring, failures or unattended activations.
Version with high current trigger output:
- Before connecting the trigger, check that system is not armed (status on display must be “CHECK FUSE”, not "KILL" or "ARMED")
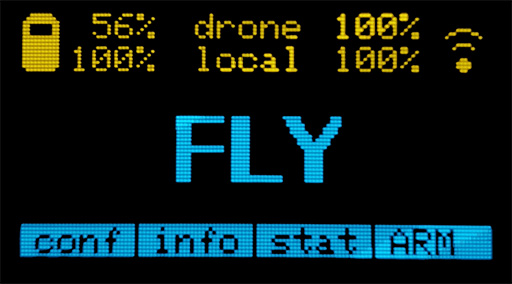
- Ensure trigger is connected and detected by the launcher controller unit (display indication must be “FLY”)
All versions:
- Watch the display for any error detected, or any blinking value indicating a warning condition (display indication must be “FLY”)
Operating the system
Arming the system
When radio is turned on, it defaults to a normal flight condition; this is indicated by the FLY label on the display (unless specific errors are notified, see the relative section).
To prepare for flight, arming is required. This is done from the main manu, by keeping the “ARM” button pressed for about three seconds.
Visual indicator of arming in progress will be displayed as in the pictures below.

Display will switch to ARMED and the KILL button will blink orange.
Radio is now engaged and on standby, ready for quick activation.
ATTENTION!!
From now on, the system is ARMED! A single click on “KILL” button will stop the motors and activate the parachute immediately!
Always handle the activation radio with extreme care while it is armed!
To disarm the system, keep the "ARM" button pressed for about three seconds, and the disarming countdown will start, similarly to the arming sequence.
Terminating the flight
Pressing the red KILL button while in ARMED mode will immediately stop the motors and deploy the parachute.
KILL button will blink red, and display will show the KILL symbol.
From this point, recovery of the drone is no longer possible via its own power.
Do NOT disarm the system for any reason until you recover the drone AND you make sure that the flight control is not commanding the motors to spin.
In case of a parachute controlled landing or crash, remove power immediately from the drone after it is recovered.
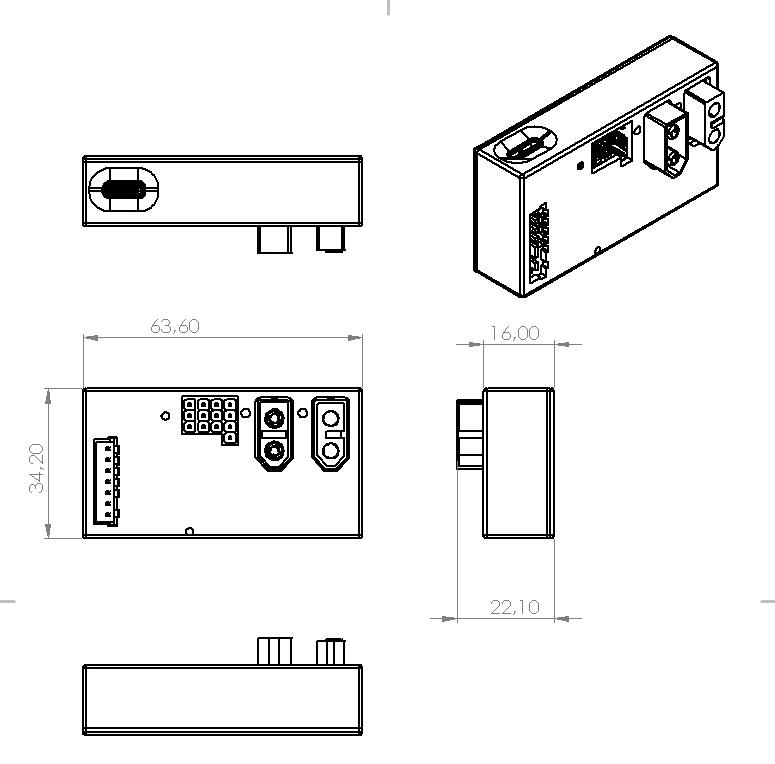
Technical details
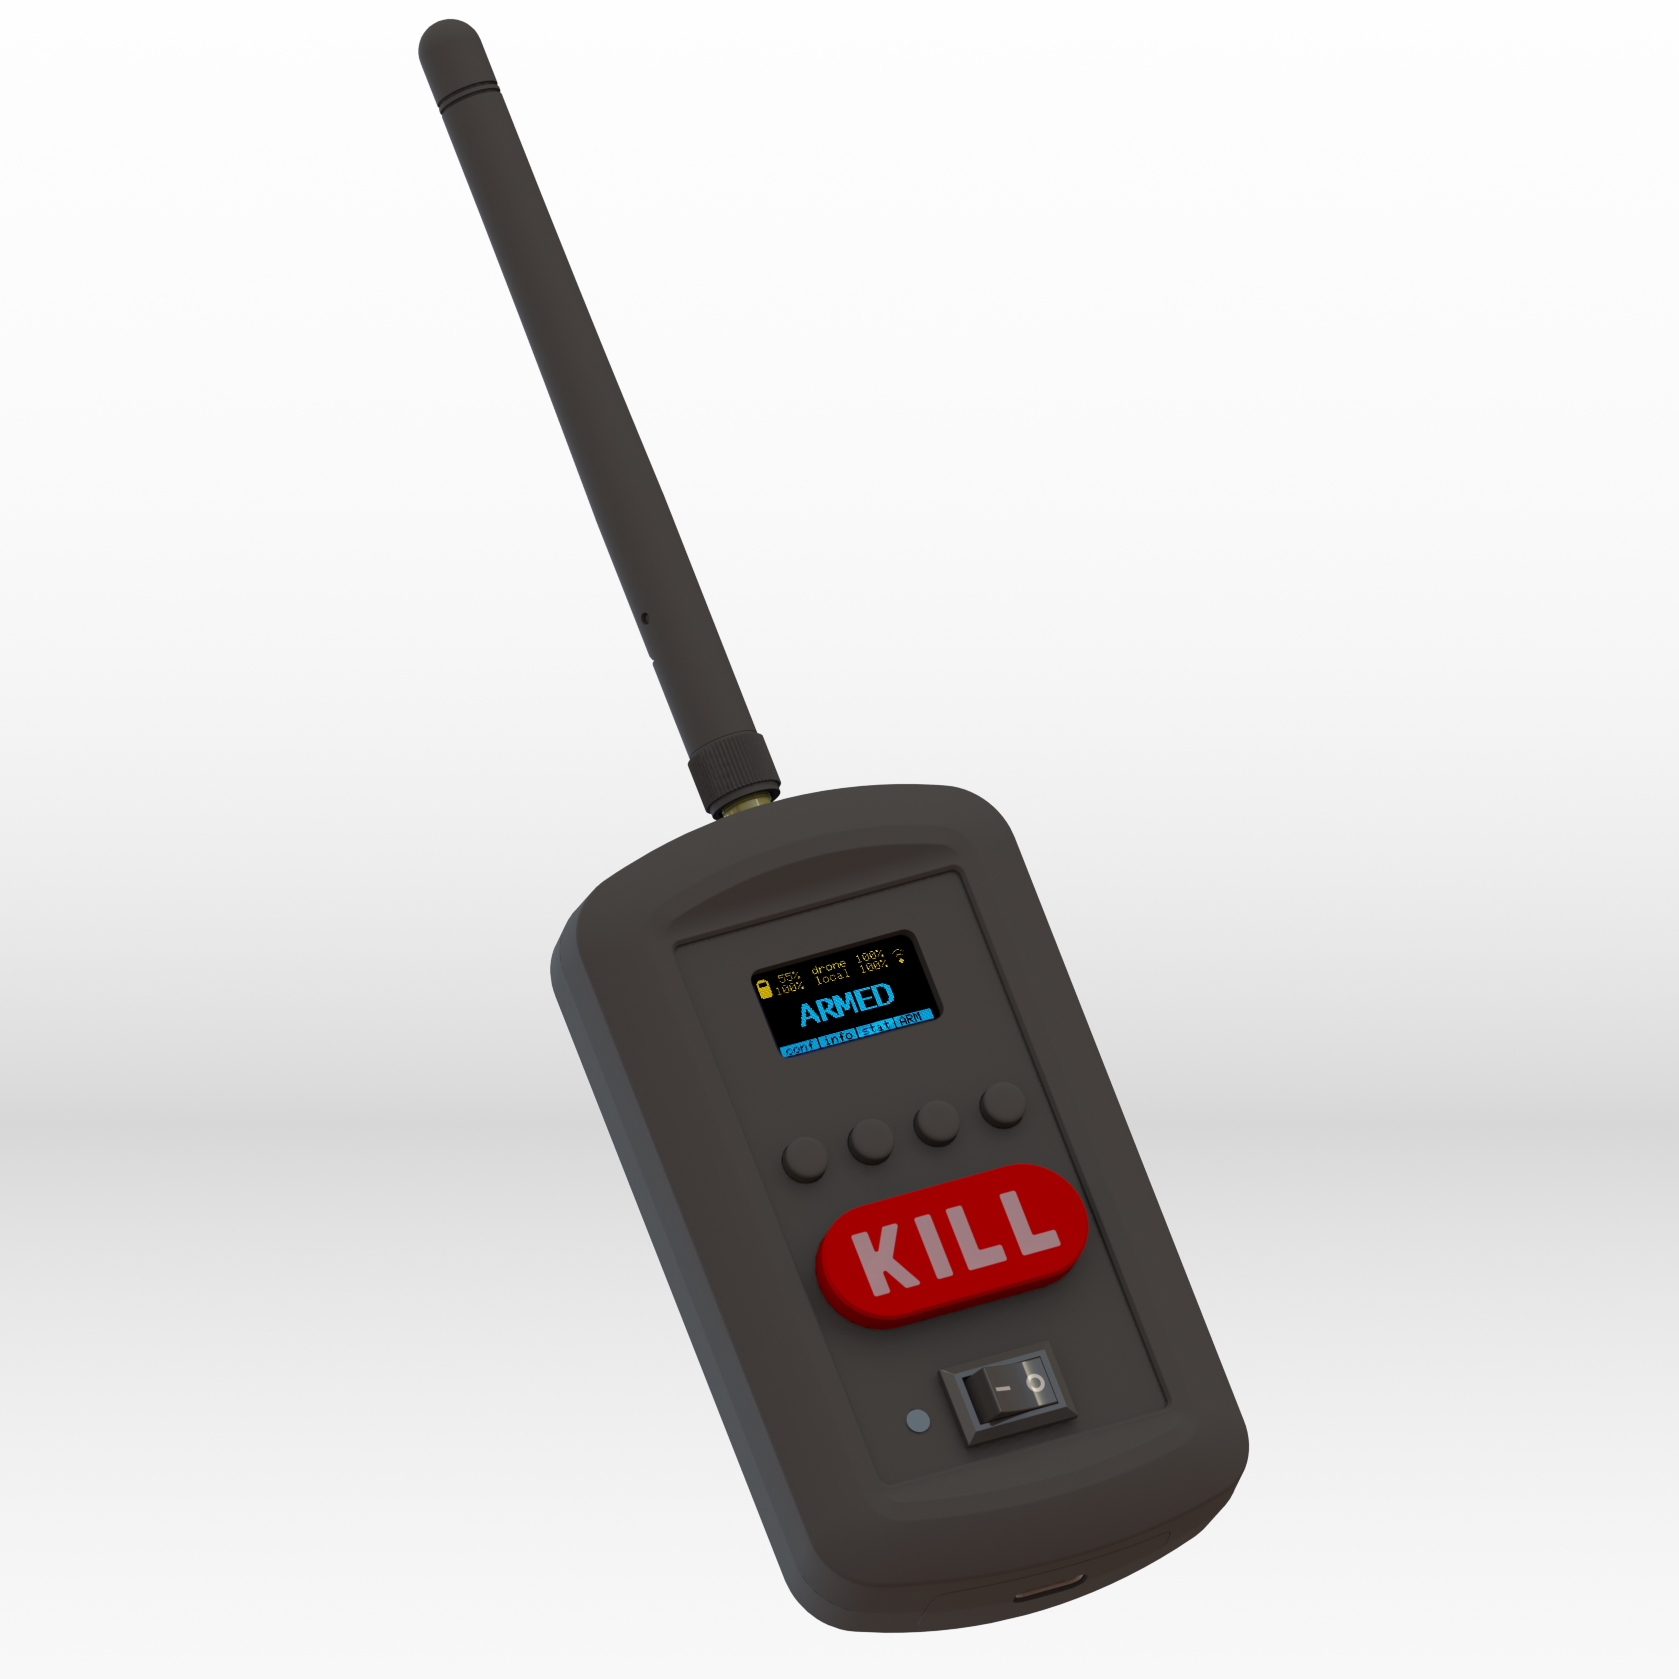
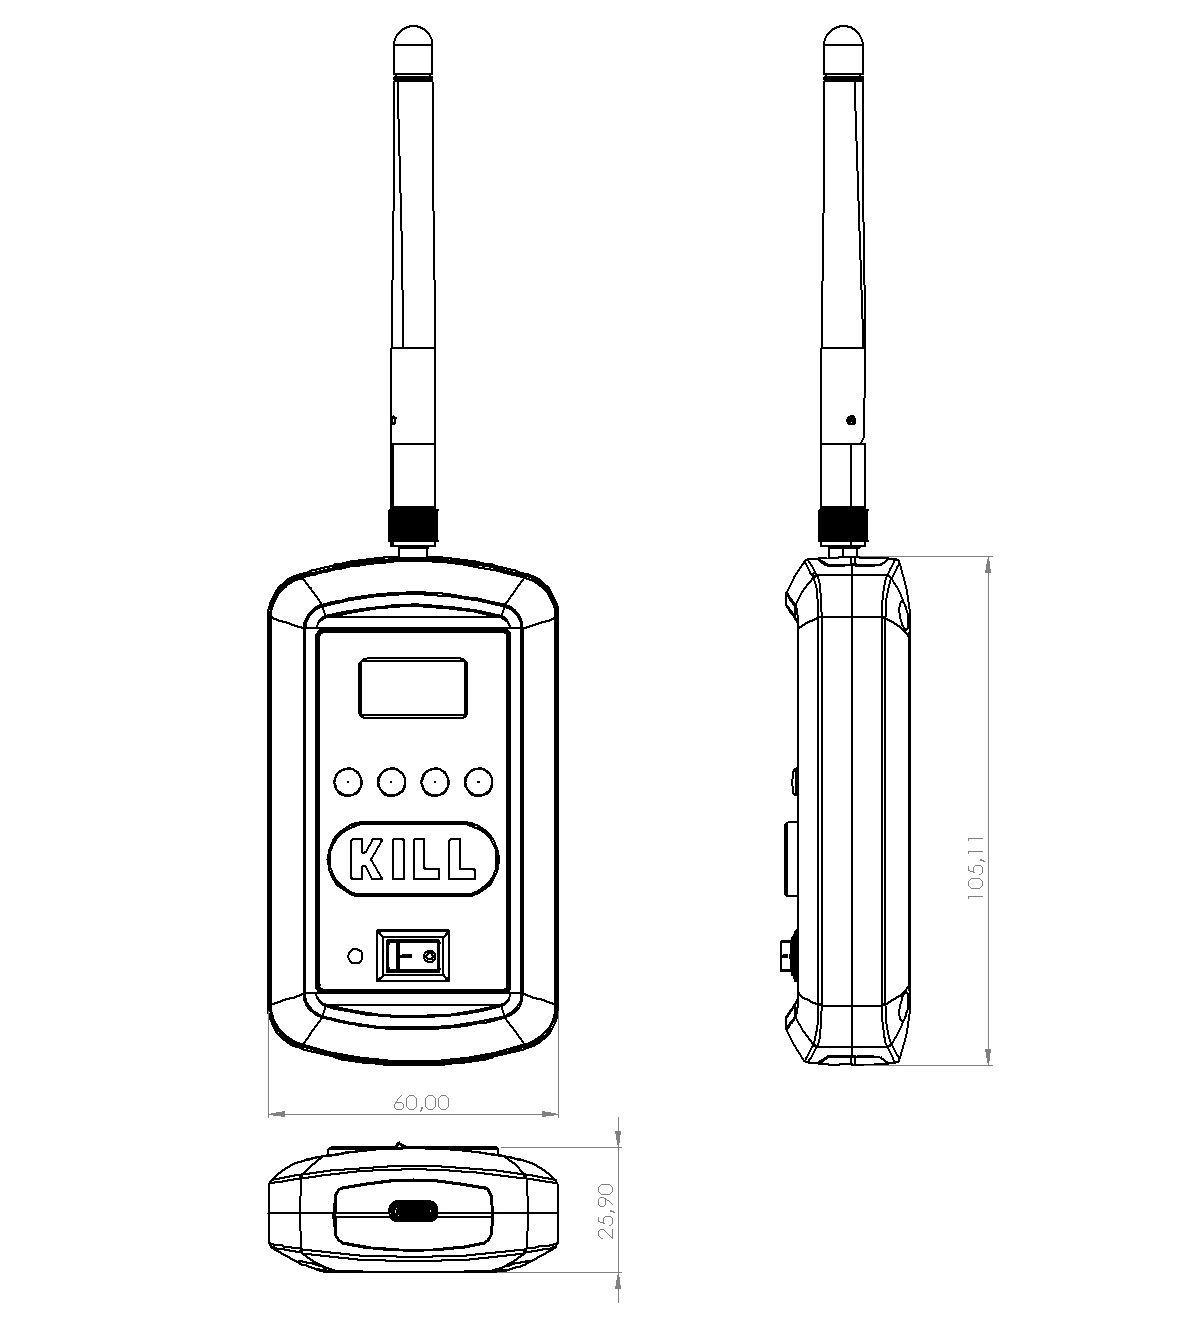
Hand-held tansmitter
- Bright graphical OLED display
- 4 buttons for configuration
- USB type C charging port and data transfer
- 1500mAh integrated battery
- 12 hours operation
Receiver
- 2s to 6s operation
- 3x configurable 5v standard RC output channels (1 used by motor cutoff)
- 1x TTL 3.3v serial port for future expansion